DIY Candy Corn Onesie

We are SOOO excited for Halloween! And of course we want to celebrate all day tomorrow. :) So since Noah probably won't be okay with wearing his costume the whole day, we decided to make him a cute candy corn onesie. It's a pretty simple project that you can make on any shirt for your kiddos.

Here's what you'll need to get started:
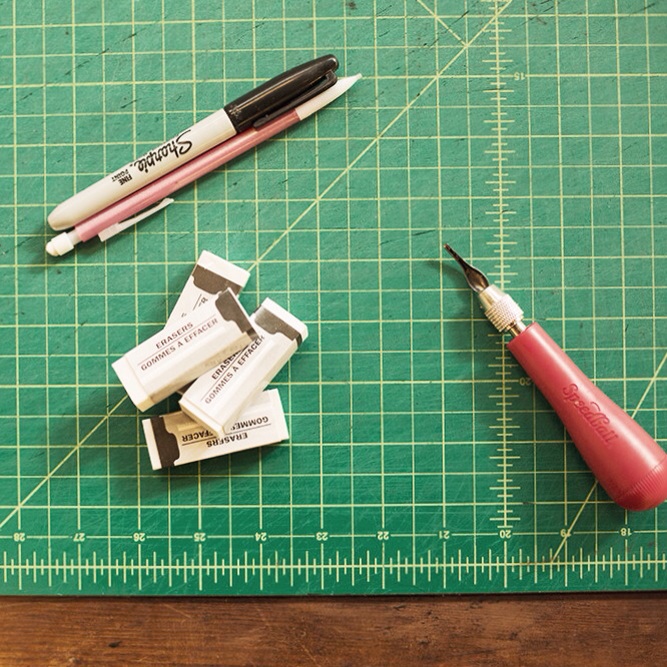
MyOnlySunshineBlog_FallCraft_DiyCandyCornOnesie
  • 2 erasers
  • white onesie (or shirt)
  • yellow fabric paint
  • orange fabric paint
  • carving tool
  • pencil

Here's what you do:

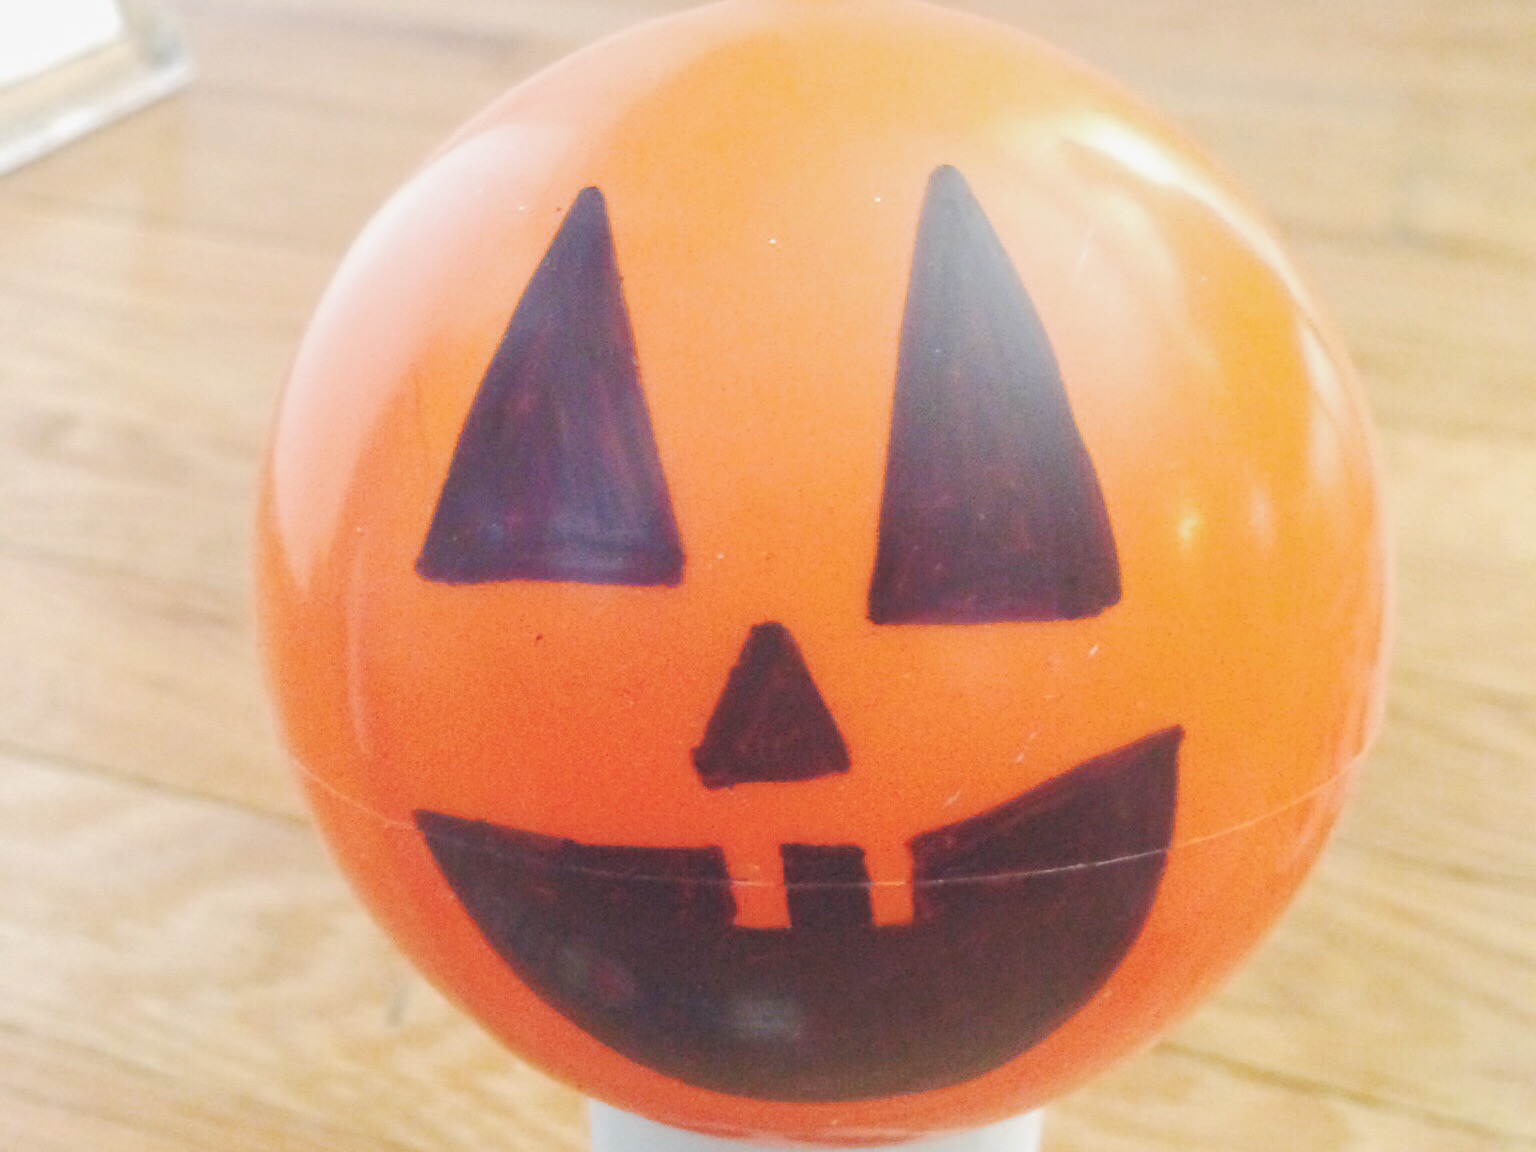
1. Draw your candy corn on one of the erasers with your pencil. (Make it a thick layer of pencil)

MyOnlySunshineBlog_FallCraft_DiyCandyCornOnesie

2. Then press the two erasers together (the one you drew on and the blank one) to stamp the candy corn drawing onto the new one.

MyOnlySunshineBlog_FallCraft_DiyCandyCornOnesie

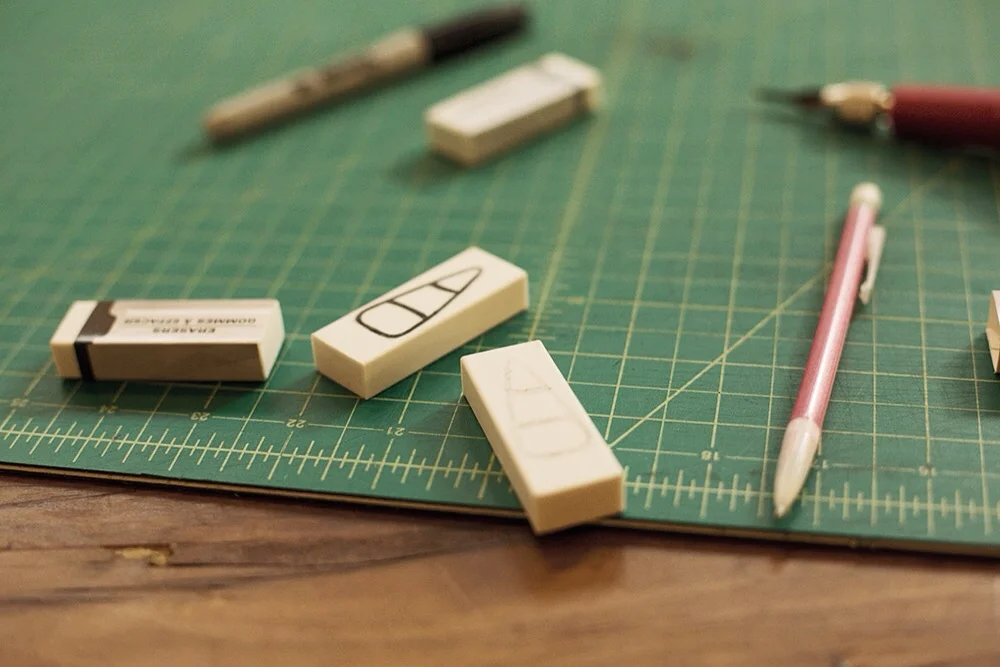
3. The second candy corn will be faint, so trace over it to make it dark like your first one.

MyOnlySunshineBlog_FallCraft_DiyCandyCornOnesie

4. For the outline and bottom of the candy corn, cut out all around the outside of the candy corn and the two top sections of one eraser. On the second eraser, cut out all but the middle section of the candy corn.(See picture below)

MyOnlySunshineBlog_FallCraft_DiyCandyCornOnesie

5. Take the outlined candy corn stamp and dip it is yellow paint.(Or orange and use yellow for the next step) Use the stamp to create a little candy corn outline.

MyOnlySunshineBlog_FallCraft_DiyCandyCornOnesie
image.jpg

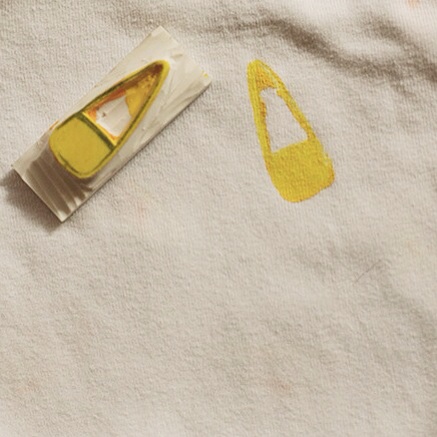
6. Then take your other stamp (with the middle section) and dip it in the orange paint. Line the stamp up as close as you can and stamp it.

MyOnlySunshineBlog_FallCraft_DiyCandyCornOnesie

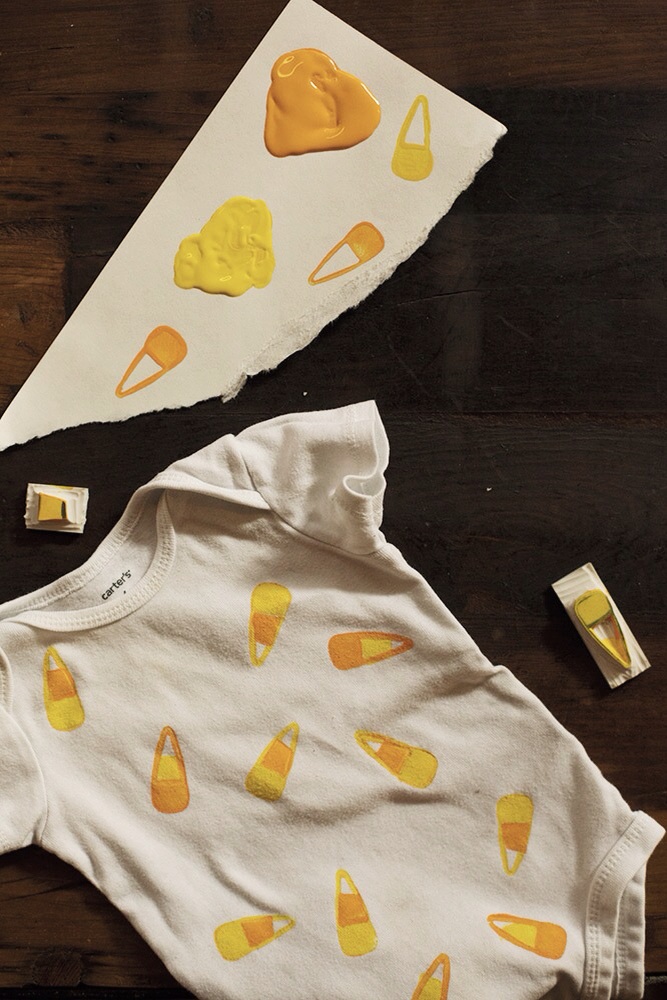
7. Repeat steps 4 & 5 all over the onesie. (Make it to your liking)

MyOnlySunshineBlog_FallCraft_DiyCandyCornOnesie

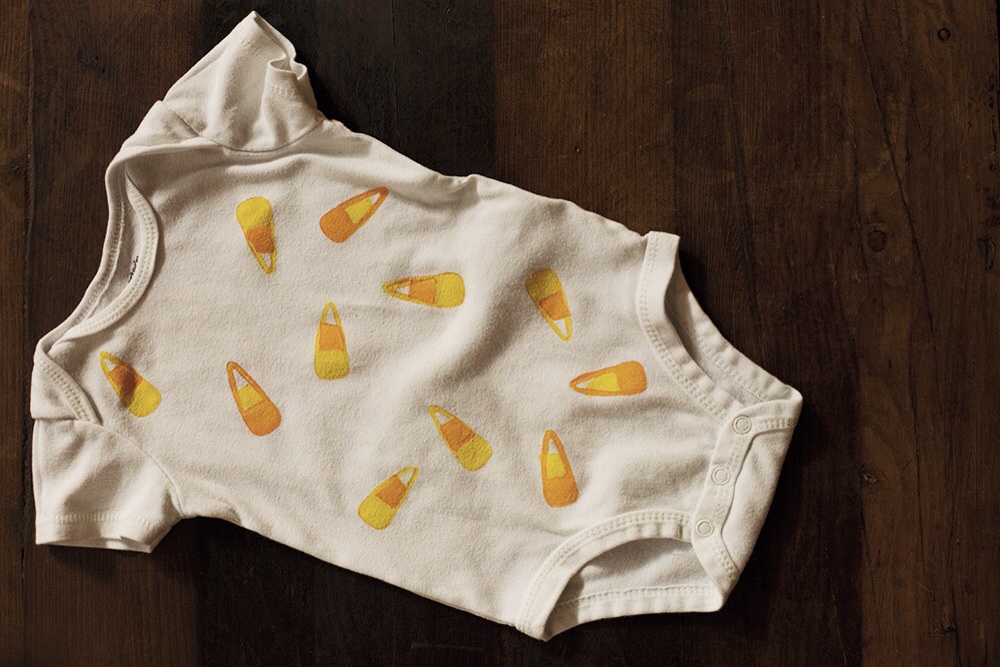
That's it! You now have a fun shirt your little one can wear during the day on Halloween. We can't wait to let Noah wear his! Of course we will post pictures and you should too. :)

MyOnlySunshineBlog_FallCraft_DiyCandyCornOnesie

Happy Thursday!

Britt & sky

DIY Halloween Goodie Bag + Free Printable

Halloween is all about the treats. Today we have a fun printable that is going to help make our DIY treat bags a little sweeter.

DIY Halloween Goodie Bag + Free Printable (click through for details)

Here’s what you need:

  • small craft bags (we’ve had ours for a while, but you can find similar ones here)
  • candy
  • printable (download here)
  • double-sided tape

Here’s what we did:

1. We printed the printable (here) (print out however many you are going to need to make enough treat bags). We cut them out and laid them to the side.

2. We got out the number of bags that we needed and we filled our bags with our special treats.

DIY Halloween Goodie Bag + Free Printable (click through for details)

3. Next, we folded the top edge of the bag over and stapled it shut.

4. After writing the names on the tags, we folded the printable and used double-sided tape to stick it on. 

DIY Halloween Goodie Bag + Free Printable (click through for details)

​And there you have it!  A fun and unique treat to give to someone you care about.

DIY Halloween Goodie Bag + Free Printable (click through for details)

We’d love to see your treats! Make sure to follow us and tag us on Instagram, Twitter, or Facebook!


xoxo

Britt + Sky

DIY Fall Centerpiece

Our entire plan for all of our fall decorations has been to come up with ideas that are inexpensive and simple, but are super cute and have a lot of impact.

DIY Fall Centerpiece (click through for details)

We think our DIY fall centerpiece fits in very well. Costing us right at $8 for the entire thing (pretty awesome, huh? The dollar store has definitely been our friend so far this fall. They have had several awesome fall options for us to use that obviously are only $1 and have been so cute!!)

DIY Fall Centerpiece (click through for details)

Here is what you need:

  • fake pumpkins (from the dollar tree)
  • fake leaves (from the dollar tree)
  • spray paint
  • paint
  • paint brush

Here is what we did:

  1. We spray painted all of the pumpkins white.
  2. We laid out all of the leaves that we wanted to use.
  3. Next we painted the leaves with gold paint.

Putting it together:

  1. After all of the paint dried, we randomly laid down all of our leaves. It’s very hard to be random on purpose, so we try to just sort of drop them and leave them. We do adjust some of them to make sure that we like it. :)
  2. Then we evenly placed our pumpkins across the leaves. (we tried 3 and 5 but it just depends how long your table is)
DIY Fall Centerpiece (click through for details)

Yay!!! We now have a super cute (and cheap) table runner for fall!

If our post inspires you to create a fun fall centerpiece be sure to show us. Follow and tag us on Instagram, Twitter, or Facebook!!

xoxo

Britt + Sky

DIY Fall Door Hanger

It's fun to have a door hanger for each of the changing seasons. So of course we needed to make a fall hanger. What says fall more than leaves and gold? :) Not much. 

Fall Door Hanger (click through for tutorial)

Here's what you need: 

  • canvas or other sturdy fabric
  • fabric paint
  • hot glue gun
  • leaves
  • glitter  
  • glue stick
  • dowel rod
  • string

Here's what we did: 

1. We had already gotten our leaves ready for this when we made our DIY Fall Garland

2. We started the hanger by cutting our canvas fabric into a rectangle.  

3. Next we folded the bottom two corners in to meet each other. Making a point at the bottom. 

Fall Door Hanger (click through for tutorial)

4. Then we sewed around to hem all of the edges. 

5. Next we folded the top down about 2 inches and sewed all the way across.

6. We then inserted the dowel rod and tied on our string to both ends. 

Fall Door Hanger (click through for tutorial)

7. Once that was done, we printed out a "W." Carefully cutting out the letter and using the remainder as a template. And then using gold paint, we traced and filled in the letter. 

8. Lastly we hot glued the leaves along the bottom and then glued a few randomly about. 

Fall Door Hanger (click through for tutorial)

And that's it! We have a super cute door hanger that is perfect for fall! We hope you love it!

Happy Monday y'all! 

xoxo

Britt + Sky

Halloween Bowling

Today we have a fun, easy game you and your kiddos can make and play together!

Here's what you need:

  • Empty toilet paper rolls
  • White paint
  • Black paint
  • Small orange rubber/plastic ball
  • Sharpie

Here's what to do:

1. Paint all of your toilet paper rolls white. You can make as many as you like, we made eight.

MyOnlySunshineBlog_HalloweenBowling_Diy

2. After the white paint dries, let your kiddos paint on ghost faces with the black paint. Set those aside to dry.

MyOnlySunshineBlog_HalloweenBowling_Diy

3. Take the orange ball and let one of your older kiddos turn it into a jack-o-lantern using the sharpie.

MyOnlySunshineBlog_HalloweenBowling_Diy

4. Allow the pins and ball to dry completely before letting the kids play.

5. When its time to play set up the pins in any arrangement. Take turns rolling the ball, and seeing who can knock over the most pins, just like regular bowling.

MyOnlySunshineBlog_HalloweenBowling_Diy
IMG_0640.JPG

You can play this inside or even outside on the patio. It's a lot of fun for the kids because not only can they play, they also get to help create the game. It's a fun game for every one and very inexpensive. We hope you and your kiddos have fun playing!

xoxo

Britt + Sky