DIY Fridge Folder

Today we have a diy that will help organize your life a little more. With this fridge folder you can store any important papers, menus, or even emergency information on your fridge so you have easy access to them.  

Heres what you'll need to get started: 

  • file folder
  • washi tape
  • scrapbook paper
  • string or rope
  • self stick magnets  
  • stick glue
Diy Fridge Folder. Click through for details.

1. Cut out your scrapbook paper to fit onto your file folder. Glue it down and let it dry completely.

Diy Fridge Folder. Click through for details.

2. Add washi tape for decoration. 

Diy Fridge Folder. Click through for details.

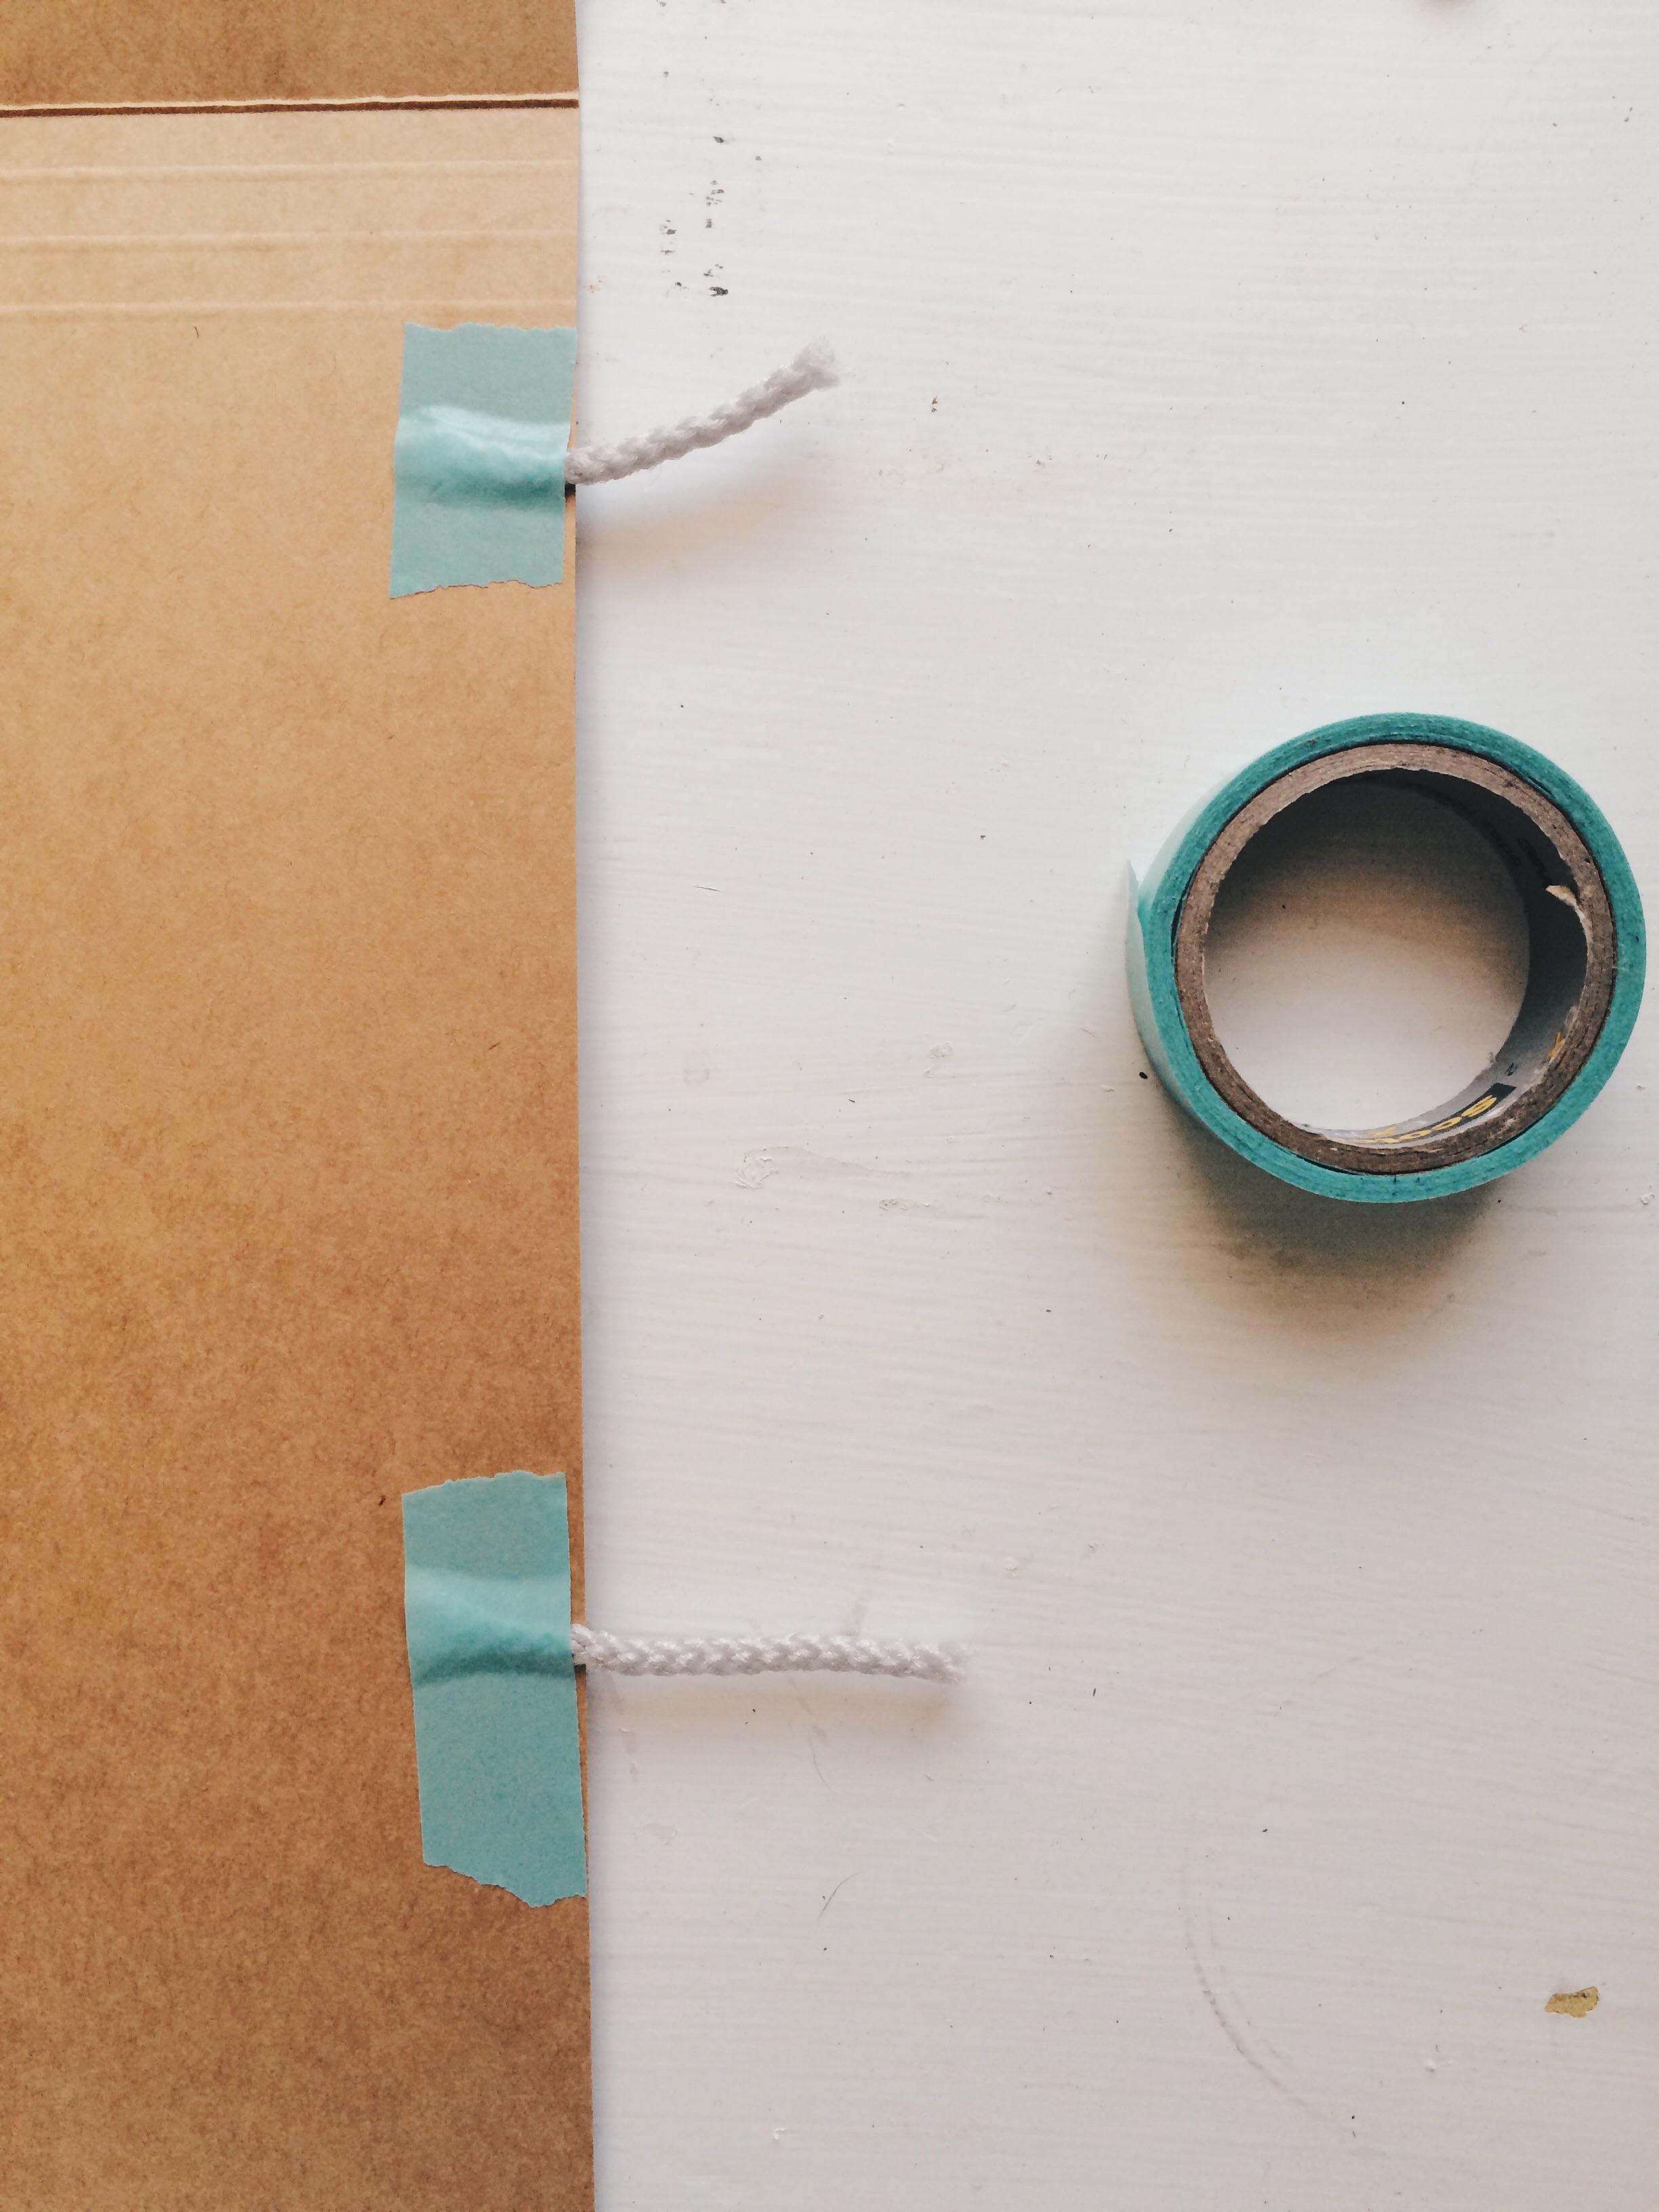
3.  Cut your rope (or string) into four pieces. Each piece should be 1.5-2 inches long. 

Diy Fridge Folder. Click through for details.

4. On the inside of your file folder tape two pieces of your rope on one of the edges. Repeat this on the opposite edge.

Diy Fridge Folder. Click through for details.

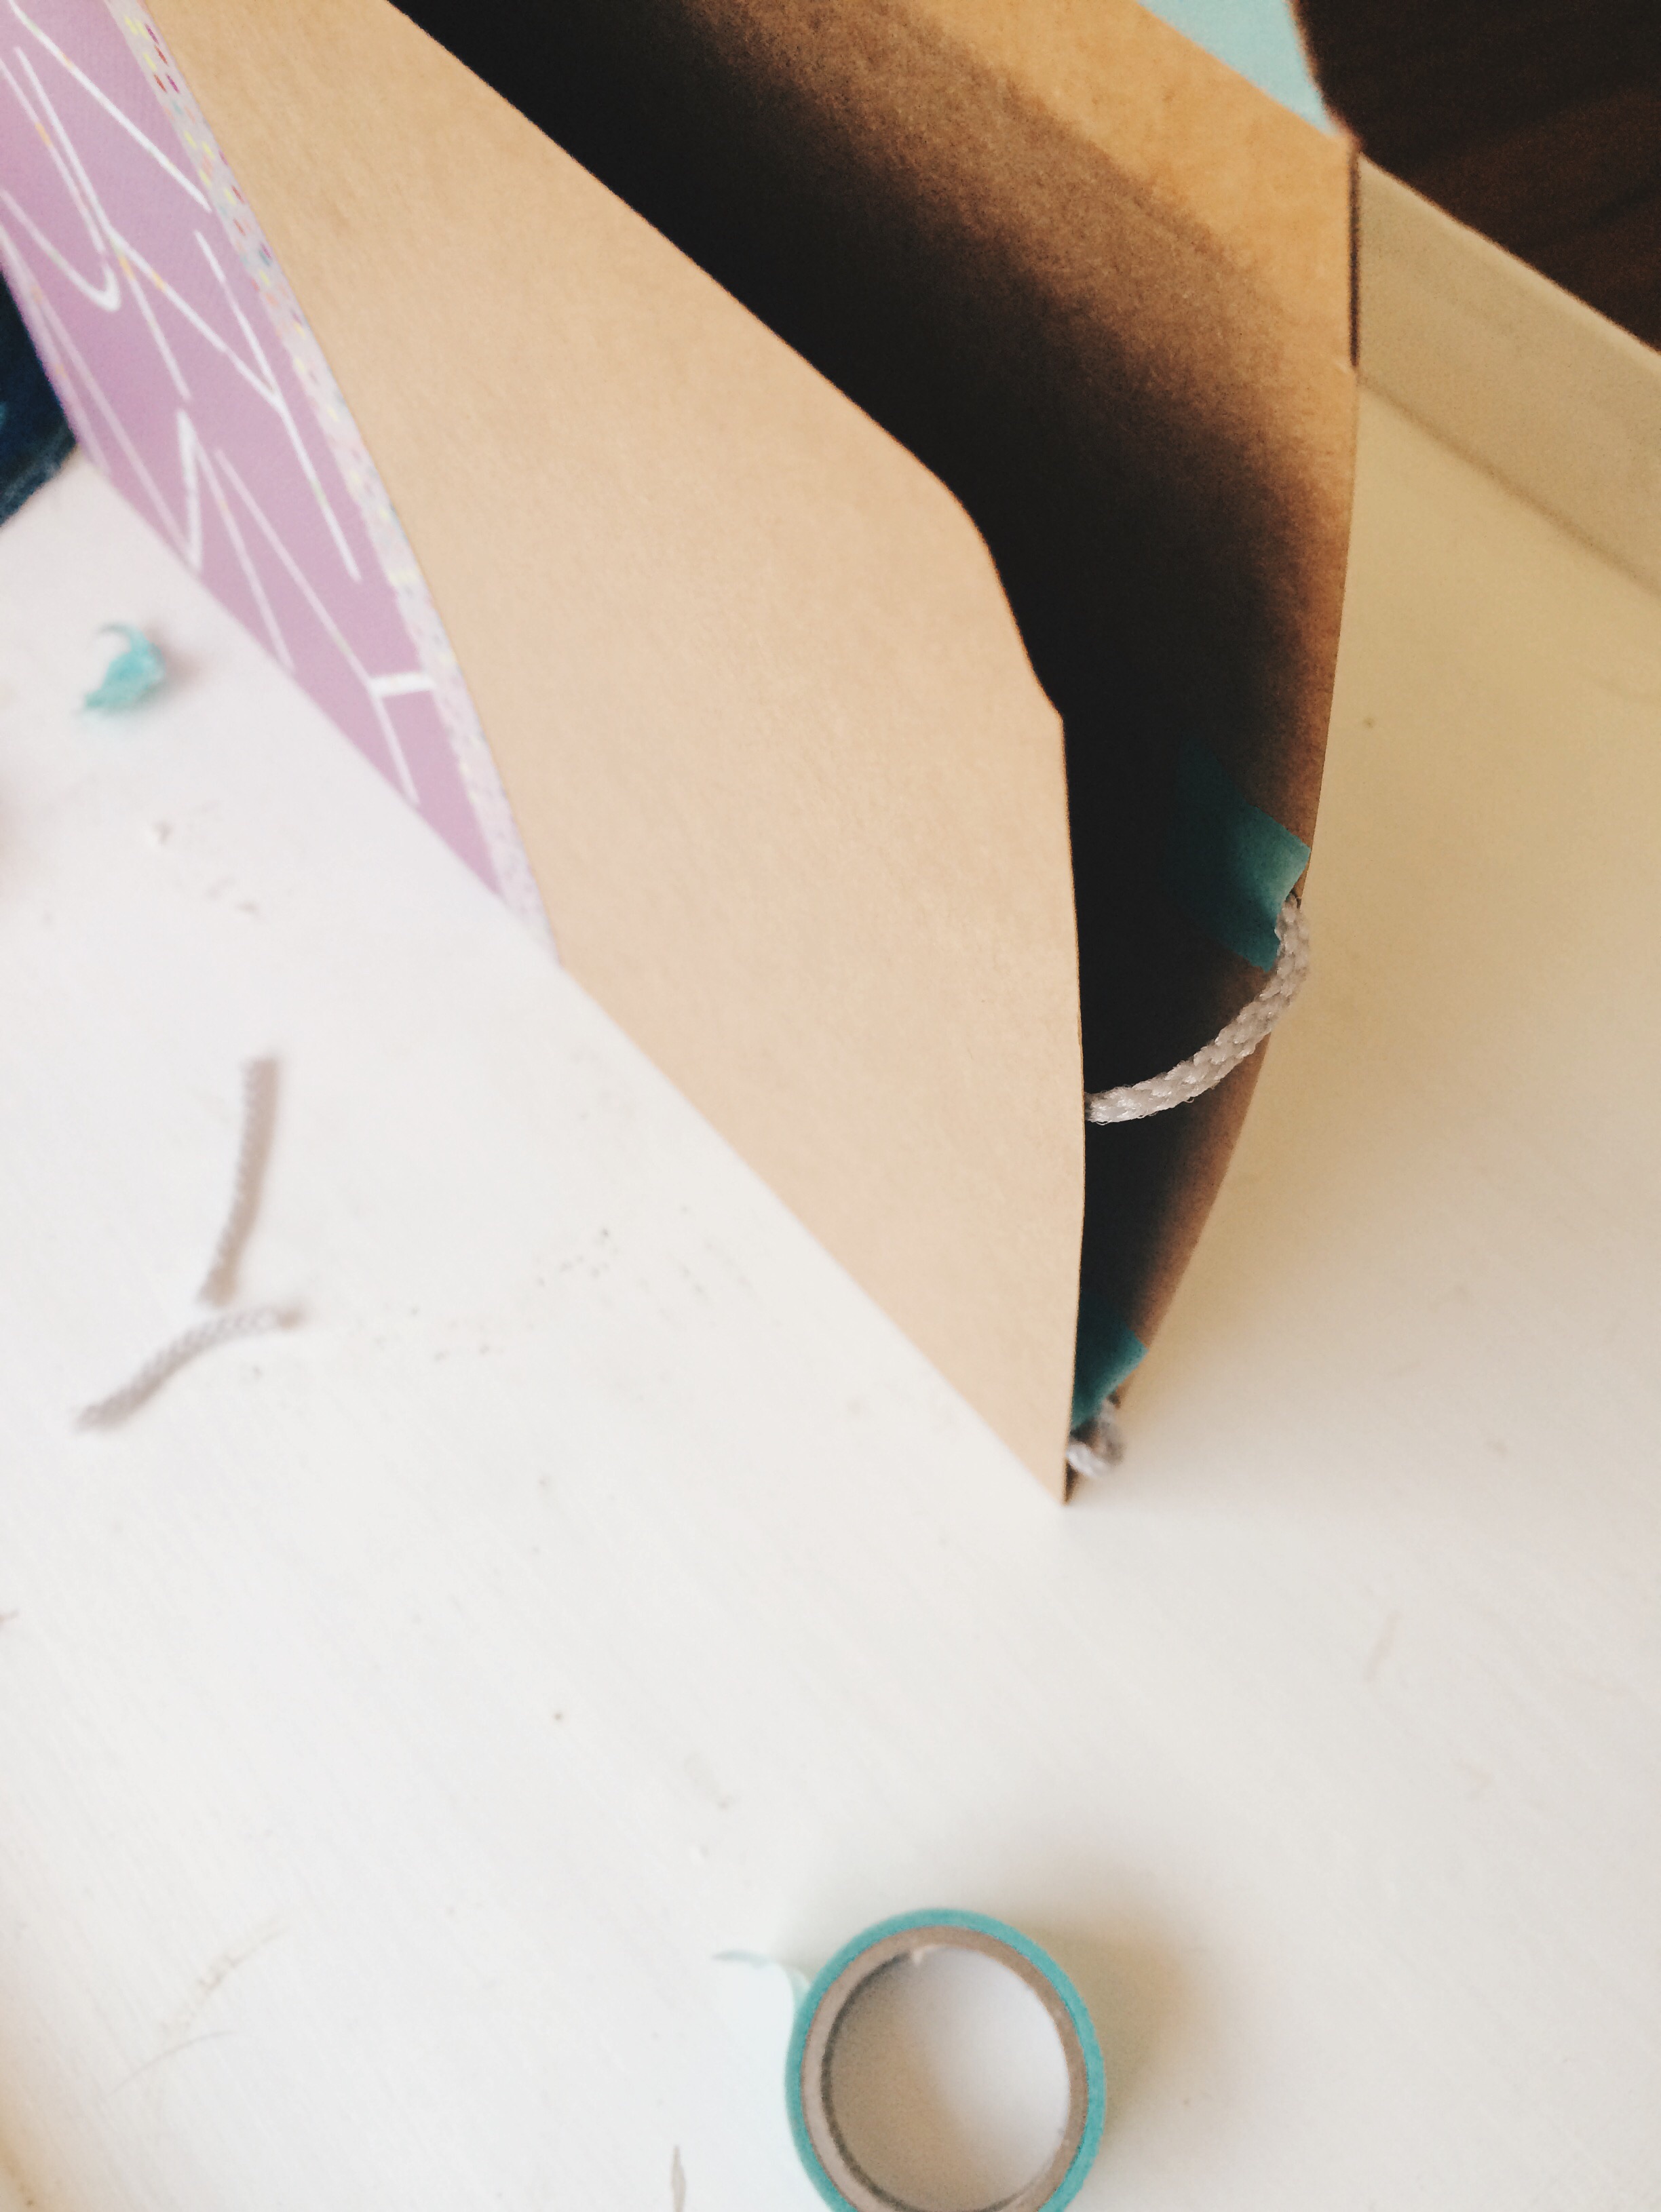
5. Take the other end of your rope pieces and attach them with tape onto the other edge of the folder. Repeat onto all four pieces.

Diy Fridge Folder. Click through for details.

6. Add five magnet strips to the back of your file folder.

Diy Fridge Folder. Click through for details.

Then hang it on your fridge and add whatever papers you want. This fridge folder is both useful and makes a cute decoration on your fridge. :)

Diy Fridge Folder. Click through for details.

xoxo, Sky

DIY Tassel Key Chain

Awhile back we started making these adorable tassels for different projects. They are super simple to make and can go great with a lot of things. Today we are gonna show you how we turned one of our tassels into a fun key chain. 

To get started all you need is:

  • embroidery floss (four colors) 
  • jump ring
  • scissors  
Diy Tassel Key Chain. Click through for details.

1. Head on over to our original Diy Tassels post to and follow the steps. On step one you are instucted to wrap the floss around 8 times, but since you have four colors wrap each one around twice. 

Diy Tassel Key Chain. Click through for details.

2. Once you have followed all the Diy Tassels steps you should have an adorable, little tassel. 

Diy Tassel Key Chain. Click through for details.

3. By tying a secure knot in the top of your tassel, form a loop.  

Diy Tassel Key Chain. Click through for details.

4. After you have formed your loop cut off any extra floss. 

Diy Tassel Key Chain. Click through for details.

5. Spread open your jump ring and use it to connect the tassel to your key ring. Then securely close the jump ring. 

Diy Tassel Key Chain. Click through for details.

Now you have this adorable little decoration for your key ring. Or these are also perfect for small, fun gifts. And of course the color selection is endless! 

Diy Tassel Key Chain. Click through for details.

Pick out four of your favorite colors and try it out for yourself. Let us know how it turns out! xoxo, Britt + Sky

Throwback Thursday

As the weather is finally warming up and spring is on its way, it is time to spruce up your home. Here are some of our favorite projects that will be bring the perfect amount of color to your home to brighten it up after this cold winter.

    1. Decorative Initial 

    Throwback. Click through for more.
    Throwback. Click through for more.
    Throwback. Click through for more.
    Throwback. Click through for more.
    Throwback. Click through for more.

    All of these projects can be adjusted to fit with your home decor. But with the right color choice and placement in your home, they will bring the perfect amount of color to your home. With the warming weather these projects will help bring the warmth int your home. xoxo, Britt + Sky

    Diy Wood Art

    There was some tree slices left over from Noah's birthday and I thought I could find a way to put them to use. I knew I wanted to paint one but I wasn't sure what to paint on it. After sketching out a few different ideas, I decided to try a simple yet different approach. And that's how I got to this triangle painting. 

    Here is what I used:

    • a tree slice
    • pencil
    • paper
    • ruler
    • paint
    • scissors
    • sharpie

    1. Use your ruler to measure your piece of wood and draw a triangle that will fit within its circumference.

    2. Cut out the triangle. And use the cut out piece to trace it onto your piece of wood. 

    Diy Wood Art. Click through for details.

    3. Use the same triangle cut-out to draw a second triangle that is a little spaced out from the first. (See picture below.) 

    Diy Wood Art. Click through for details.

    4. Paint the part of the first triangle that isn't "covered up" by the second triangle. 

    Diy Wood Art. Click through for details.

    5. Outline your shapes in a thick line of black sharpie. 

    6. Erase any extra pencil lines.

    Diy Wood Art. Click through for details.

    Thats all. It's pretty simple, but I love it. It's a great art piece to sit on a shelf. Or you could always hang it on the wall. I really love how it makes it seem as if though the top triangle has been cut and is moving out from the piece of wood.

    Diy Wood Art. Click through for details.

    To me this piece is simple but not in a bad way. I love simple things. :) I sat mine on my dresser shelf and love it! It goes great with a lot of the decorations I have in my room. And of course the colors and size of the wood can be changed depending on where you will be displaying it. Xoxo, Sky

    Recycle: DIY Organizer

    I have been all about recycling lately! I have been trying my best to recycle all that I can instead of just throwing everything away. So I thought why not come up with some fun ways to reuse things. 

    Take an egg carton for example. It is a super fun container that after the eggs are gone, its job is over. But it's very simple to turn it into a super fun organizer. Why go buy something to organize your odds and ends when you could repurpose something.

    Get organized with this simple diy.

    Cut the top off of the egg carton and add some paint. I used spray paint and it took me only a couple minutes. After the paint dries, use it to organize any little things you want. It will go down into a draw very easily. Or you can have it out to display. It is a super easy and super affordable way to organize. 

    Get organized with this simple diy.

    What will you organize in yours? xo Britt