DIY Picnic Blanket

Nothing is better on an awesome fall day than a picnic! We have been wanting to find a picnic blanket that we could take to the park for a while now, but were not wanting to pay very much. So we decided to just make one ourselves.

My Only Sunshine || DIY Picnic Blanket

Here's what you need:

  • painting canvas from the hardware store (ours is 5x5 and has a waterproof backing on it which is perfect for sitting on the ground)
  • Fabric paint
  • paint brush/sponge brush
  • Posterboard
  • Pom Poms (optional; see our tutorial here)
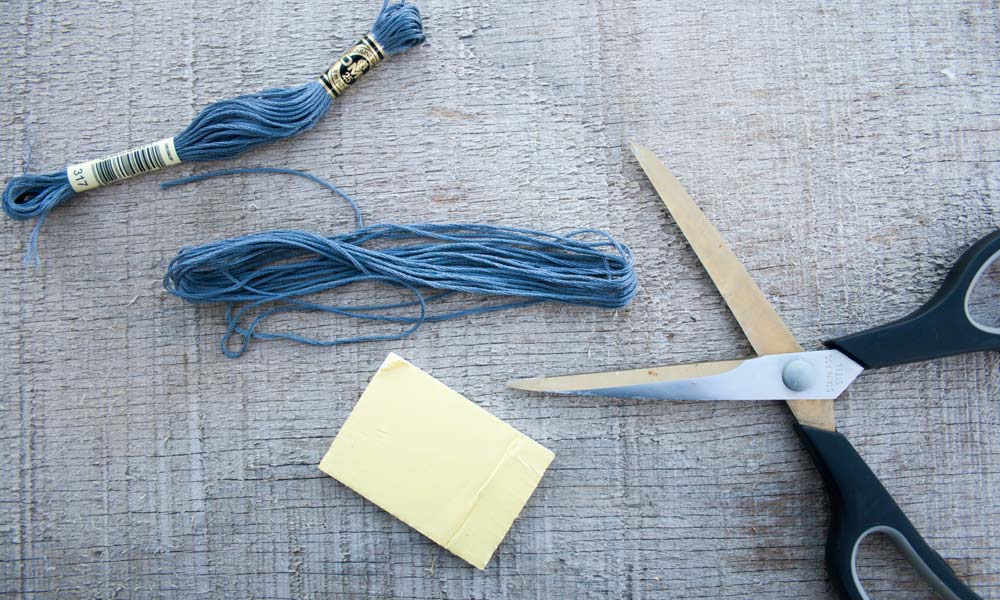
  • scissors

Here's what we did:

  1. We made up a pattern and using a posterboard created 2 templates. One large one and then a smaller one to add a few details. Because of the size of our template versus the canvas. We actually had to paint the template four times.
  2. We folded the canvas in half and then in half again.
  3. After taping down our template, to hold it in place, we used a sponge brush to apply the paint. We repeated this four times.
  4. Once that dried, we used our smaller template to paint gold squares throughout our pattern.
  5. Then we used our Pom Pom tutorial to add a finishing touch on our picnic blanket.


My Only Sunshine || DIY Picnic Blanket

And then of course, we had to go on a picnic to try it out...

My Only Sunshine || DIY Picnic Blanket

We will be posting later about our other fun picnic accessories, but if you have questions don't be afraid to ask. :)

We hope you are inspired by this fun DIY and even try it out yourself! And if you do, remember we want to see it. Make sure to tag us on Instagram, Twitter, or Facebook!

xoxo

Britt & Sky

Thrifty: Shoe Revamp

If you don't know about our love for thrift store shopping, I don't know where you've been. These shoes are another one of our thrifty finds. We found these at one of our favorite thrift store for $2. Like almost all of the things we get on our thrifty adventures, we like to clean them up and add our personality to them.

My Only Sunshine || Thrifty Shoe Refresh

This project was literally as simple as adding two colors of paint to these tennis shoes. We chose two fun colors to put on the heel and toe of the shoes. This small pop of color adds so much!

And because they are so cute we had to have a little photo shoot at the park. :)

My Only Sunshine || Thrifty Shoe Refresh

If this DIY inspires you, make sure that you are showing us. Upload and tag us in your pictures on Instagram, Twitter, or Facebook!

Britt & Sky

DIY Rollaway Train Set

Every little boy needs a train set! We bought Noah's before he was even born. We were at IKEA in the children's section (dangerous on our wallets), and we spotted this fun little train set. It's been sitting in the closet for right at seven months now. We decided that it was time to figure out what the heck to do with it. Our first instinct was to come up with some sort of under-the-bed storage. So we thought a platform on wheels would do the trick. This way, as Noah gets older, he can just roll the train set out and play and then it can just be rolled back under his bed when he is done.

My Only Sunshine || DIY Rollaway Trainset

All you need to get started is:

  • Board
  • Four
  • Screws
  • Paint
  • Painting tape
  • Train set (Ours is from IKEA)
My Only Sunshine || DIY Rollaway Trainset

This DIY is great for any little boys room and can be altered depending on the bed size and train set size. You could even use it for something other than a train set, like legos or whatever else you can come up with. Hope this inspires you to make something fun!

Britt & Sky

DIY Decorative Hanging Light

We have currently been redecorating Skylar's room (a room tour isn't too far away). One of our favorite projects was decorating her hanging light. All we used to make this cute, hanging light was:

  • Hanging Light (we got this one at Lowe's)
  • Lampshade (from Target)
  • Tassels (learn how to make them on yesterday's blog post)
  • Decorative ceiling medallion (you can get them at the hardware store)
  • Spray paint
  • Hot glue gun

First, we spray painted the ceiling medallion to match the rest of the room. We used double sided tape to hold the medallion while we screwed the light fixture into place. This held the medallion tightly in place so that Jake could wire the light.

My Only Sunshine || DIY Decorative Hanging Light

Next, we made our tassels. Make however many you think will fit and look good on the shade, we chose six tassels. We then divided the circumference of the bottom of the shade into six sections and hot-glued the tassels at each section. You can add more or less depending on the size of the shade or the look you are wanting. And that's it! It's a simple project that adds a special touch to the room.

My Only Sunshine || DIY Decorative Hanging Light

As always, we would love to see anyone's version of our diy project! And always remember to tag us at Instagram, Twitter, and Facebook!

Britt & Sky

DIY Tassels

We started making these cute tassels recently. They are quick and easy to make and can be added to a lot of projects to make them fun! All you need to get started is:

  • Embroidery floss
  • Scissors
  • Small piece of wood (The length of the wood will determine the size of your tassel)
My Only Sunshine || DIY Tassels

1. Wrap your floss around the wood eight times. (Or more depending on how thick you want your tassel)

My Only Sunshine || DIY Tassels

2. Take another piece of floss and string it through the rest of your floss. Pull both ends up at the top and tie a knot.

My Only Sunshine || DIY Tassels

3. Take a third piece of floss and tie a knot in your bundle of floss about a centimeter down.

My Only Sunshine || DIY Tassels

4. Cut off the extra from the knot you just tied.

My Only Sunshine || DIY Tassels

5. Next, cut the bottom of your bundled floss off. Cut it at whatever length you choose, but make sure to do all of your tassels the same length.

My Only Sunshine || DIY Tassels

THATS IT! You're finished and now have a cute, little tassel! Just repeat the steps for however many you need.

Soon we will be sharing with you what we used our tassels for. Until then, we would love to see new projects these tassels can be used on. Upload and tag us in your pictures on Instagram, Twitter, or Facebook!

Britt & Sky