Sleepy DIY Sleep Mask

Happy Thursday Lovelies!!

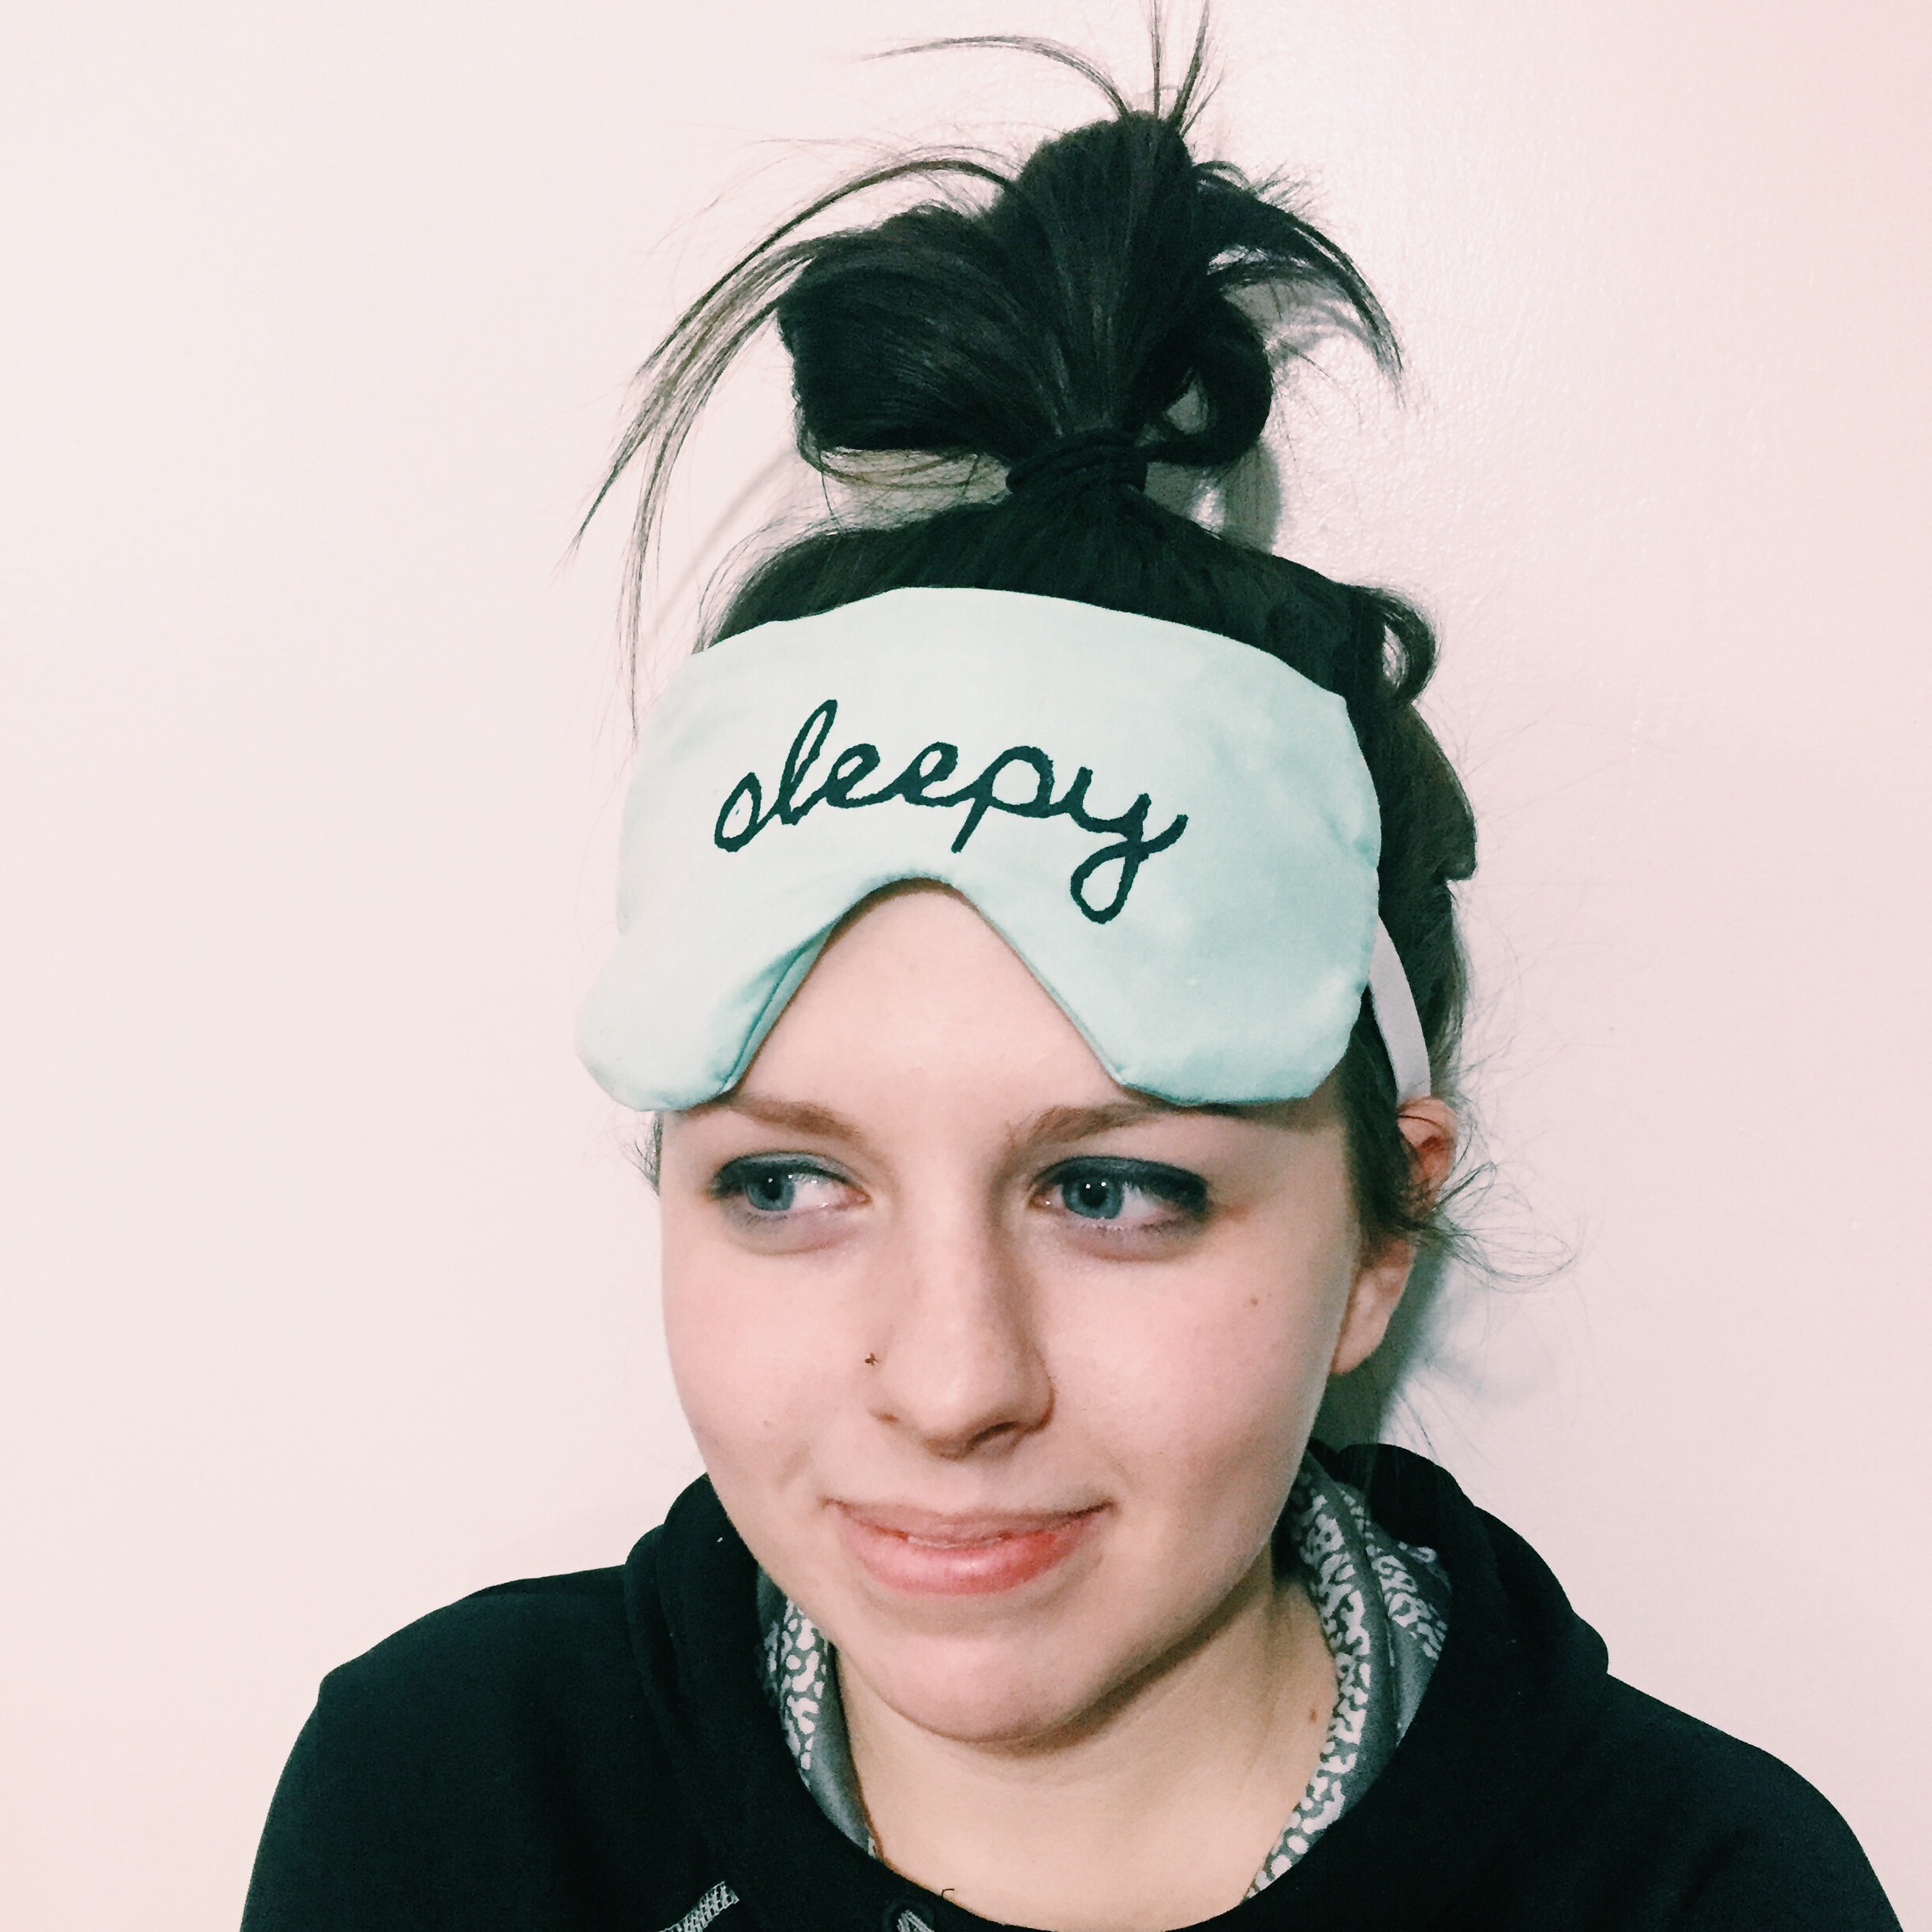
Everyone needs a sleep mask! If not to keep the light out of your eyes when you are sleeping in on the weekends, then to just look super cute! It's simple to make. Have a look for yourself. :)

Sleepy DIY Sleep Mask (click through for tutorial)

Here's what you need:

  • fabric
  • felt
  • knit elastic
  • pins
  • wax paper
  • fabric paint
Sleepy DIY Sleep Mask (click through for tutorial)

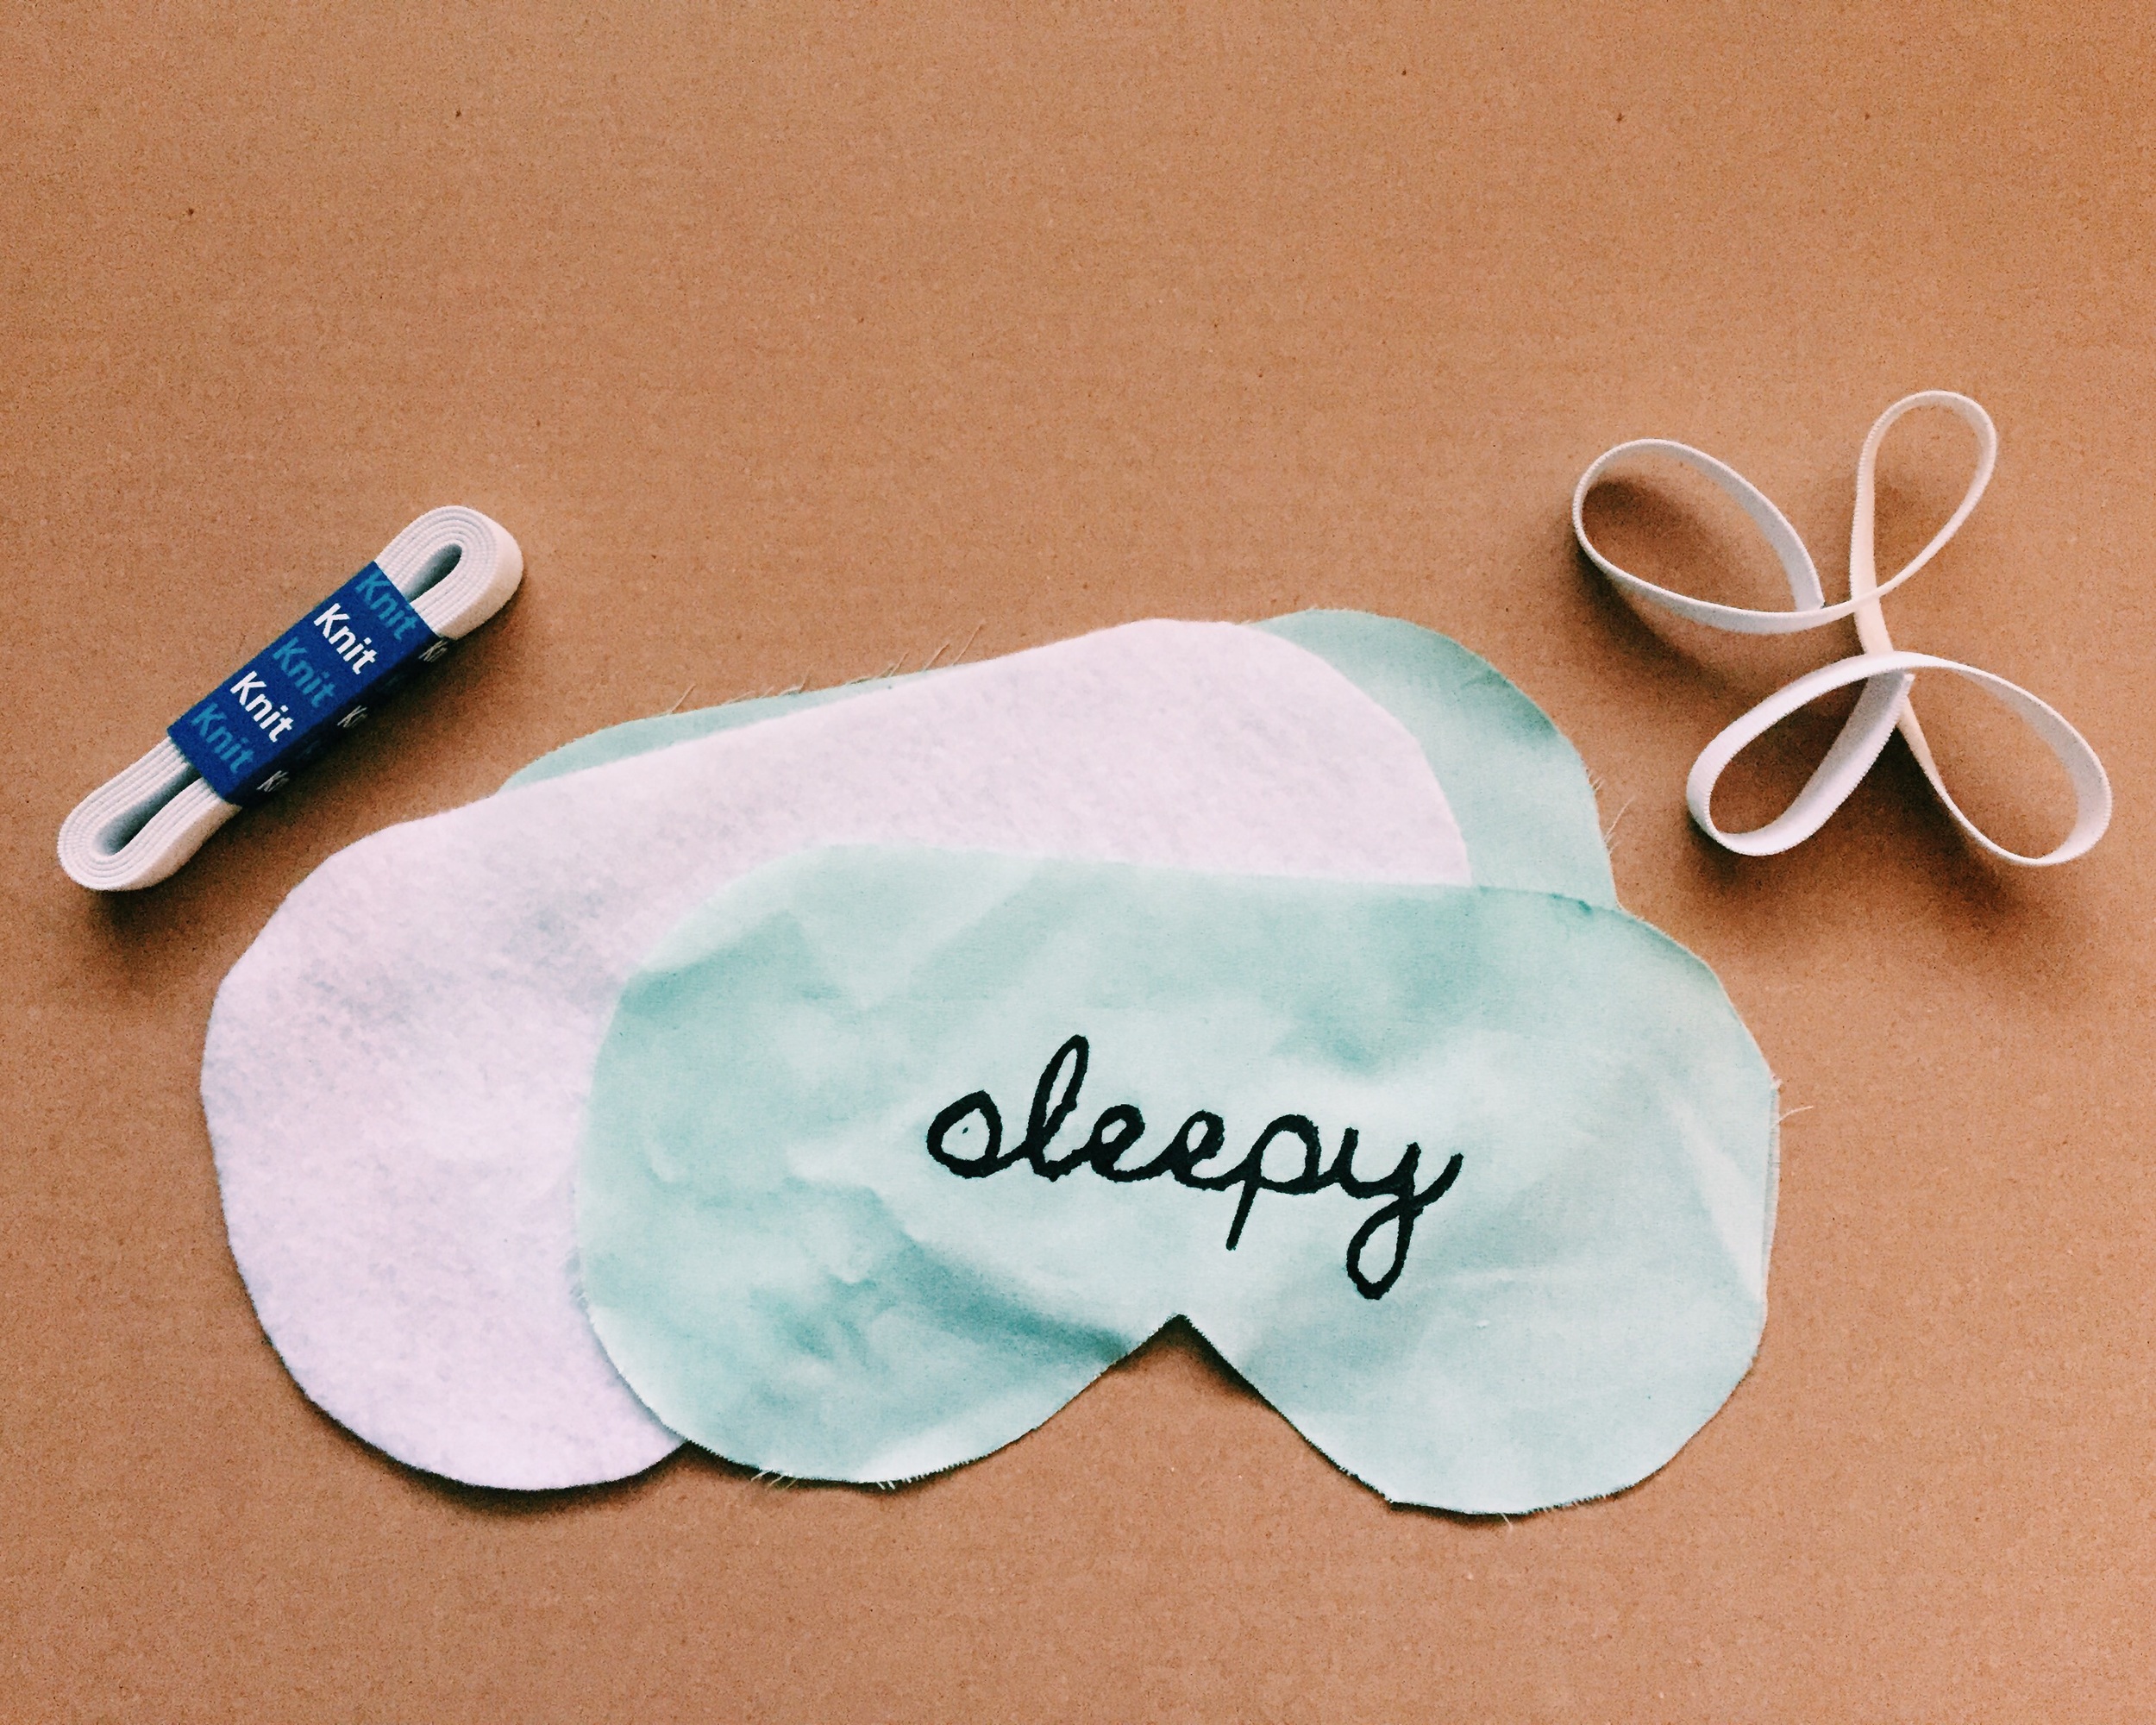
1. Using your our template or a sleep mask that you already own, trace and cut out 2 pieces of fabric and piece of felt. Then pull the elastic around your head to touch each temple to measure how long to make it.

2. Using this technique, make your sleep mask say whatever you wish. We were making this for Skylar so we thought "sleepy" was fitting. :)

Sleepy DIY Sleep Mask (click through for tutorial)

3. Pin each end of the elastic to both sides of the back piece of fabric.

Sleepy DIY Sleep Mask (click through for tutorial)

4. Then place your top piece, face down, on top of the elastic.

5. Pin to hold all of the pieces in place.

6. Sew around the edge, leaving a section to turn the mask right side out. Then by hand, finish sewing it.

7. Ta-Da! A super cute sleepy sleep mask :)

Sleepy DIY Sleep Mask (click through for tutorial)

 Are you going to make your own sleep mask? Show us! Follow and tag us on InstagramTwitter, or Facebook!!  xoxo, Britt + Sky

DIY Embroidery Hoop Dreamcatcher

We have a fun, easy way to make a dream catcher for your home. It's easily customizable, so it can look perfect in your room of choice.

Here's what you will need:

  • embroidery hoop
  • lace
  • feathers
  • beads
  • cord
  • hot glue gun
  • thread
IMG_7177.JPG

1. Cut a strip of lace that is long enough to fit across the diameter of your embroidery hoop. (We cut ours along the design of our lace.)

2. Stretch out the cut piece of lace across the inside piece of the embroidery hoop, and glue it on each edge to hold it in place. 

3. Cut off any excess lace.

4. Use your thread to tie any loose lace edges to the hoop where needed. (Not all will need it, depending on how you cut your lace)

IMG_7203.JPG

5. Set your embroidery hoop aside. Cut your cord into five pieces. You will want them to be different lengths (the outer two being the shortest and the middle being the longest). You will have to choose the lengths depending on the size of your embroidery hoop.

6. Tie one feather onto the end of each of your pieces of cord. 

7. Add 2-3 beads to each piece of cord.

8. Next, put the outer piece of your embroidery hoop on and tighten it. Then tie the end of the cord, opposite of your feathers, to the bottom of your embroidery hoop.

IMG_7197.JPG

That's all! Now, all you have to do is find a place to hang it. We are super excited about how this turned out. We have seen many dream catchers on Pinterest and different blogs, but we wanted to make ours different from the rest. After a handful of trial and errors, we finally reached a look that we thought was pretty awesome, not that we are biased or anything. 

IMG_7194.JPG

xoxo,

Britt + Sky

DIY Polaroid Necklace

Does it get much cuter than this? This is a fun spin on a locket necklace. Using simple materials to create a fun and personalized accessory. These make great gifts or are perfect just to make for yourself. 

DIY Polaroid Necklace (click through for tutorial)

Here's what you need:

  • oven-bake clay
  • rolling pin
  • x-acto knife
  • cardstock
  • blank necklace pendant
  • chain
  • super glue (or other glue of choice)
DIY Polaroid Necklace (click through for tutorial)

Preheat your oven to 275 degrees F.

Next cut your card stock. You'll need two pieces for templates. You can make the size based on how large you want to make yours. Our pieces measure 1 inch by 1 1/4 inches and 7/16 inch by 3/4 inch. Cut your piece and set them to the side.

Roll out your clay to a thin even layer. Using your larger template, cut out 2 sections of clay.

DIY Polaroid Necklace (click through for tutorial)

Using your smaller template, cut out a square from one of your larger pieces of clay. 

DIY Polaroid Necklace (click through for tutorial)

Press both pieces of your clay together.

DIY Polaroid Necklace (click through for tutorial)

Your edges may be a little messy, but they can easily be cleaned up by carefully using your x-acto and your fingers to smooth out all of the sides.

DIY Polaroid Necklace (click through for tutorial)

Next you will want to bake your clay for 15.

While its baking you will need to size and print your photo. It will be the same size as your smaller template. Ours was 7/16 inch by 3/4 inch.

DIY Polaroid Necklace (click through for tutorial)

If you want your photo to be permanent, glue your photo in and you will want to seal it. If you want to be able to change it out to your heart's content like us, just use a little piece of tape to hold it in place. 

DIY Polaroid Necklace (click through for tutorial)

Glue on your necklace pendant, put on your chain, and you are set!

DIY Polaroid Necklace (click through for tutorial)

We want to see your necklaces!! Be sure to follow and tag us on InstagramTwitter, or Facebook!! 

Happy Monday! xoxo, Britt + Sky
 

New Years Eve Prep

We always enjoy bringing in the New Year. Unlike most people we celebrate with our grandparents in a pretty low key manner. We have some yummy food, a little confetti, and a lot of fun board games. 

This year we decided to start a new tradition. Instead of making our confetti out of perfectly good paper (or buying it)  we decided to use recycled paper. Over the past couple months we have been saving newspaper, written on paper, and print paper that had already served its purpose. As this this will be Noah's first New Years Eve, we thought we would start it by showing him how to bring in the new year in a fun but less wasteful way. 

image.jpg

Even if you haven't been saving paper we're sure you can go around and collect used paper to make your confetti this year. If you have kids old enough, letting them help cut the confetti is also a fun activity for your family. And after New Years Eve you can sweep up the confetti and take it to be recycled with the rest of your paper!  Try it and start this new year off a little greener!

image.jpg

xoxo, 

Britt + Sky

DIY Neighbor Christmas Gifts

We love giving gifts! We especially love making gifts for people. And of course we couldn't forget about our neighbors!

After making a batch of puppy chow, collecting some containers from around the house, and getting out the hot cocoa ingredients, we were ready to get started. 

We had a lot of fun deciding what each neighbor would get and putting the gifts together. We especially like our little reindeer treat bag we put together for the little boy across the street! We printed out a few labels (you can download a few of them here)  and got them all ready! We can't wait to deliver them! 

DIY Neighbor Christmas Gifts (click through for details)
image.jpg
DIY Neighbor Christmas Gifts (click through for details)

Have fun making your own DIY gifts! Yay for Christmas week! xoxo, Britt + Sky